My Little Cabin Retreat Sewing Room
When we bought our house we decided this front porch turned front room would be the place for my sewing room. We moved all the boxes and furniture in but I refused to put any of it away. I couldn't leave the walls this dark green, much to dark and so uninspiring. Plus I knew if I didn't do it right away it might not happen for awhile.
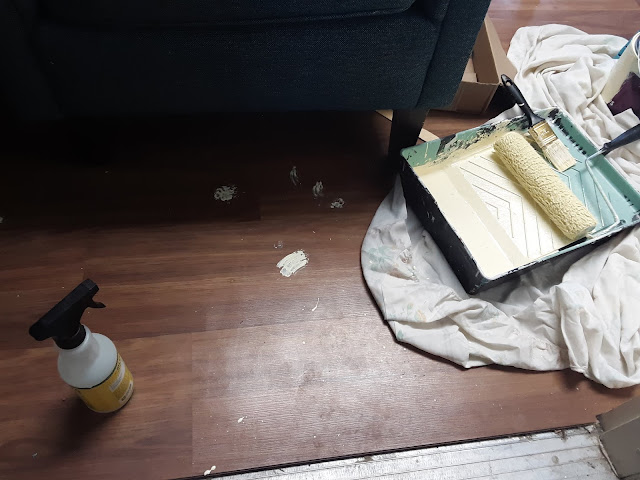
So, with everything pushed to the middle of the room and shuffled around as I went...it turned a lovely shade of pale yellow! As you can see, the cat made sure his mark was left! Haha!
I was pleased with how bright it made the room and so I moved right in and sewed away!
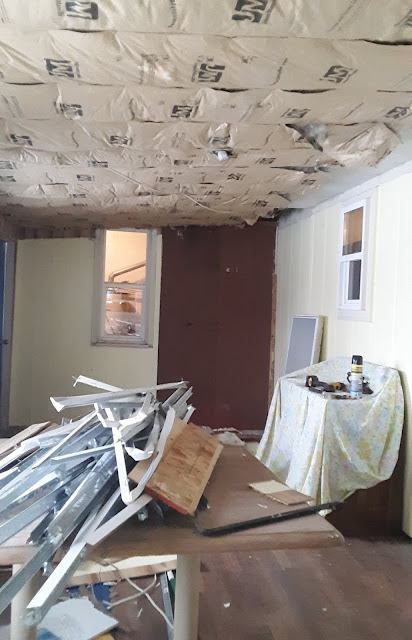
Until...the ceiling tiles right above the door began to crumble and fall due to a leaky roof. My husband patched the roof but the ceiling was rather disgraceful and so on his idea, I moved everything out and we began remodeling the sewing room!! Yay!
I wasn't really sure what we would find above the ceiling tiles but we were pleased to discover the insulation wasn't too bad and that we could raise the front side of the ceiling a few inches. It is very low since it was just a porch at one time. I am short so no problem there, but a few friends always have to use the other door! Haha!
Also, since it was a porch there were four outdoor windows into the regular part of the house. We pulled them out and framed out two of the windows. The two in this picture we ended up just covering to create a bit more wall space.
Hehe, here is the one into the living room!
First up was the ceiling, the part actually needing replaced. The only way this became a reality was the fact that we had several below zero spells early this spring and my husband built us a sawmill. That and he is a logger, so the supplies weren't a cost only time.
Little man and I helped some in this fashion, but he really wasn't a fan of the loud tools. We mostly watched from our window!
The previous lighting was one single fluorescent light. My husband put in FIVE led inset lights! Woohoo for more lighting!!! He also added two more outlets and brought the light switch into the room. (It was in the living room?!)
The lighting doesn't do this picture justice. We put red cedar on the ceiling and it is sooo pretty!Once the ceiling was up it was onto the walls. We went with wide blued pine boards put up horizontally. Most are 10 or 12 inches wide with a few 8 inch. These boards were not completely dry but with the cozy wood fire they soon were, shrinking them a bit. We wanted that gap to form so we could chink them! We used cheap caulk to fill in most of the gap and then chink caulk to give the log cabin look. I LOVE the way it turned out!
The room might have been finished much sooner if we'd gone with a vinyl flooring. It would have been quicker but expensive and also wouldn't have gone as well with all of the REAL wood in the room. Sooo, we happened to have several ash logs that were dry and bought a planer. Hurray for wood floors!
Our little guy is a pretty cute cheering squad and distraction!
The piano, a wardrobe and one other cupboard stayed in the room during installation so we did half, moved them over and did the other half. My job was to apply the danish oil. We didn't put any poly down so that we can simply sand out scratches or gouges rather than refinish the entire floor.
We used cedar for the trim work. And that board down by the floor is the beginning of...
...my wall of shelving!! Hurray!
Oh, I LOVE this feature! I had a cheap pressboard shelving piece that held a large portion of my fabric. The last move out of the room was its last and it fell to pieces. Now I filled this with my lovely fabrics!
Back in 2014 I turned an old dresser of my grandparents into this one drawered cupboard. I blogged about it HERE. My husband suggested we get rid of it as the room was bursting with furniture before. I wanted him to built me an ironing station rather than bring back my old metal ironing board so I could utilize the space under it. We compromised! The top of this was a bit warped so we took it off, turned it over and sanded it down. Being an old piece of furniture it was made of good, solid wood.
We secured the back a bit more and I covered it with cotton batting and this home decor fabric! Voila! An ironing station AND I kept my old dresser!
Finding a place for everything was tricky but I really tried to cut out a few items to keep it a little less cluttered. Not sure I succeeded in that, but I LOVE it! And that is what matters, right?! I even pulled out my 3 or 4 cases of thread I have accumulated from several sources and went through and organized it all by color! The fabric organized by color makes my heart happy too! :)
I am so blessed to have a husband who can and WILL take the time to make things nice for me!
Sew there you have it, my little cabin retreat sewing room!
Alissa


What a fabulous transformation! Congrats on your new sewing space. LOVE that you found a way to preserve that piece from your grandparents - pressing station for the WIN!!!
ReplyDeleteThank you, I love it!
DeleteOh wow!! that is amazing!! I was thinking the yellow would be good, but I think I am glad your roof needed help ( and it wasn't awful help_) - this is Ah!! Mazing!! You are going to have MANY Happy years of stitching in there!
ReplyDeleteThanks! Yes, I was happy with the yellow but I LOVE the new transformation!
DeleteI can only imagine how wonderful all that cedar smells!!! You are blessed indeed to have a mate who not only does things for you, but creates even better than you imagined. What a gem, both the sewing room & hubby.
ReplyDeleteWow how awesome! You are a lucky girl 😁
ReplyDeleteThanks.😊
Delete